Fused Deposition Modeling

3D Printing (Additive Manufacturing) is a Family of Technologies

When we talk about 3D printing, it is a catch-all phrase that encompasses several distinct technologies, each with its own strengths.  Here are some comparisons of additive manufacturing options in plastic, metal and composites:

3D Printed Plastics

Fused Deposition Modeling (FDM)

Learn more about FDM

Standard Materials: ABS

Relative Cost: ★★☆☆☆

Machine Finish: ☆☆

ABS Prime Finish

Typical Lead Time:  2-5 Business Days

Specialty Materials: PC, nylon, ULTEM and many more (See FDM page)

Relative Cost: ★★★★☆

Machine Finish: ☆☆

Typical Lead Time: 3-7 Business Days

FDM Pros: Very high accuracy on large parts, diverse materials, rigid and tough, fast turnaround, sparse fill for light weight with high part volumes

FDM Cons: Striated machine finish, low resolution on features under 0.030"

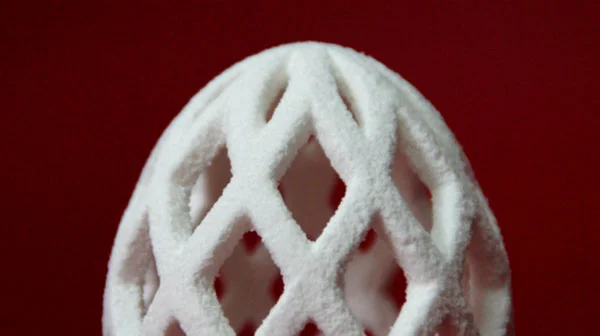
Polyjet (Objet) Printing

Learn more about Polyjet

Standard Materials: Acrylic and polypropylene-like

Relative Cost: ★★★☆☆

Machine Finish: 

Typical Lead Time:  2-5 Business Days

Specialty Materials: ABS-like, various elastomers and digital materials (See Polyjet Page)

Relative Cost: ★★★★☆

Machine Finish: 

Typical Lead Time: 3-7 Business Days

Polyjet Pros: Top quality detail, best surface finish, clear material option, embedded textures, fine features, single piece mechanical assemblies

Polyjet Cons: Resins - not industrial thermoplastics, lower heat resistance, better for smaller parts

Selective Laser SIntering (SLS)

Learn more about SLS

Standard Materials: Nylon and glass filled nylon

Relative Cost*: ★★★☆☆

Machine Finish: ★★★☆☆

Typical Lead Time:  5-10 Business Days

Specialty Materials: Rubber (TPU), carbon filled nylon and other composites (See SLS page)

Relative Cost: ★★★★☆

Machine Finish: ★★★☆☆

Typical Lead Time: 5-10 Business Days

SLS Pros: Real thermoplastic and thermoplastic composites, uniform matte finish, great thermal and mechanical properties

SLS Cons: Large and thick parts can warp, longer production lead times, porous material, low resolution on features under 0.030"

*In volume SLS can become one of the least expensive printing processes.

Large Format 3D Printing

Learn More about Large Format 3D Printing

Standard Materials: Epoxy infused Acrylic

Relative Cost*: ★★★☆☆

Machine Finish: ★★★☆☆

Typical Lead Time:  5-10 Business Days

Specialty Materials: Sand (Sand Casting), Low Ash Burnout Resin (Investment Casting)

Relative Cost: ★★★☆☆

Machine Finish: ★★★☆☆

Typical Lead Time: 5-10 Business Days

Large Format Pros: Largest build size of any 3D printers, cost effective for large parts, casting patterns and molds without any additional tooling

Large Format Cons: Not as durable as SLS or FDM, not intended for small objects, longer production lead times compared to smaller printers

3D Printed Metals

Note: 3D printed metals tend to be 5 to 10 times the cost of 3D printed plastics and are often more expensive than machined metals.

Direct Metal Laser Sintering (DMLS)

Learn more about DMLS

Standard Materials: Aluminum, stainless steel, tool steel and titanium

Relative Cost: 

Machine Finish: ★★☆☆

Typical Lead Time:  5-15 Business Days

Specialty Materials: Cobalt chrome, inconel, (nickel alloy) and more (See DMLS page)

Relative Cost: 

Machine Finish: ★★★☆☆

Typical Lead Time: 5-15 Business Days

DMLS Pros: Stronger than cast parts, works with exotic and expensive to machine metals, can make parts that are otherwise not manufacturable

DMLS Cons: Limited part size (generally under 10"), rough finish, lower tolerance than machining, generally more expensive than machining

Printed Metal

Learn more about Printed Metal

Standard Materials: Stainless steel bronze alloy

Relative Cost: 

Machine Finish: ★★☆☆

Typical Lead Time:  10-20 Business Days

Specialty Materials: None

Relative Cost: N/A

Machine Finish: N/A

Typical Lead Time: N/A

Printed Metal Pros: Half to a third the cost of typical DMLS parts, beautiful bronze polish look, easily plated, larger bed than DMLS

Printed Metal Cons: Single available material, low strength to weight ratio for metal, long lead time relative to other 3D technologies

3D Printed Composites

Colorjet Full Color Composite

Learn more about Colorjet

Standard Materials: Full color composite

Relative Cost: ☆☆

Machine Finish: ★★☆☆

Typical Lead Time:  2-5 Business Days

Specialty Materials: None

Relative Cost: N/A

Machine Finish: N/A

Typical Lead Time: N/A

Full Color Composite Pros: Full gradient of 390,000 colors, generally least expensive material, fastest way to make large models, very rigid

Full Color Composite Cons: Features thinner than 0.100" can be brittle, does not have the flex of real plastic


3D Printed Food: A Sweet Idea

3D Printed Mesh Egg, work of Julian Sing (http://www.3dprintingpin.com/3d-printed-sugar-models-made-from-sugar/)

3D Printed Mesh Egg, work of Julian Sing (http://www.3dprintingpin.com/3d-printed-sugar-models-made-from-sugar/)

Any time I see an article about 3D printed food, I’m drawn to it… after 18 years with Nabisco, it’s a habit.  Lately, I’ve been speculating how the technology will change our approach to food processing, especially baked goods.  And despite my enthusiasm for additive manufacturing, I’m not sure the industry is going to widely adopt 3D printing – it took YEARS for them to abandon lard for soy bean oil.  Maybe to appreciate my skepticism, you have to understand:

1.    How baked goods are typically made

2.    Where most challenges occur in the process

Just like at home, the first processing step is mixing.  You take your ingredients (several ingredients - all of which have different handling requirements and product characteristics) and mix them together in a methodical way.  The methodology – and technology - differ based on what is being made. So, I can’t see a near-term solution to this challenge.  Other than automated delivery or continuous mixing, traditional manufacturing techniques are likely to remain dominant.

After mixing, you turn the dough into cookies or crackers.  Here’s the next challenge, cookie doughs and cracker doughs are generally very different and – yep - have different handling requirements and product characteristics.  Cracker doughs first have to be sheeted and layered to ensure the crackers are flaky.  Afterward, cutters form the crackers.  If they’re round, there will be excess dough but it is immediately reused.  Salt is then applied.  Cookie doughs are mostly soft and so are deposited or molded into shape – already efficient processes that generate little scrap if done right.  So if food processing is already efficient and generates little scrap, there’s less advantage to adopting additive manufacturing techniques.   

Next, the raw dough pieces are baked... typically by continuous baking, often on ovens the length of football fields with hundreds of top and bottom burners that are 5+ feet wide.  As the product travels through, it is baked, usually in 3 -7 minutes, and afterward, if needed, coated with toppings like oil.  The continuous nature of baking is also very efficient – if done correctly – and again, makes 3D printing less practical.  If it is an iced cookie then the coating is applied through extrusion in a manner somewhat similar to Fused Deposition Modeling, the warm icing is applied and quickly hardens as it cools.

Probably the biggest obstacle is existing infrastructure.  The largest food processors have millions committed to traditional manufacturing and are not likely to radically transition to additive manufacturing.  Yes, Hershey plans to 3D print custom chocolate designs and Contractor has “created a proof-of-concept printer that can print chocolate onto a cookie” but current chocolate processing is already an additive process:  The liquid is poured into a mold and hardens as it cools.  Where it differs is the resulting chocolate is a standard design and not customized.

But let’s consider how and when 3D printing might work. 

If you were observant, you picked up that cracker doughs are layered (laminated) before being cut, so one could print the doughs and produce a cracker ready to be baked, but not at the speed currently required of food processors.  

We could also theoretically laser sinter a cookie or cracker dry mix to form the product, but without oil or water, it probably wouldn’t taste great – and then there’s the flammability (explosiveness) of flour and sugar powders when subjected to sparks.  So that might be a problem…

Then there’s binder jetting.  This technique is actually being used by Julian Sing to 3D print objects in sugar:

According to Michael Franco “Combining his love of model making and baking, Sing modified a ZPrinter 310 Plus from 3D Systems to be able to produce creations out of sugar and water. The printouts aren't entirely edible yet because of a secret involved in the process that Sing wouldn't share, but they sure look good enough to eat.”  I found this observation very humorous for two reasons:  I know what’s typically used to bind 3D prints – and it is definitely NOT edible, and I can remember times during baking when sugar hardened into shapes on its own – and that was NOT very fun to deal with.

What about vat photopolymerization – well not the material - but the technique?  I suppose a process might be developed to expose layers of a liquid batter to light in a way to bake it, but again I can’t imagine it would taste very good or be efficient enough.

So why even consider these approaches?  Well space limitations might be one reason.  It certainly is a consideration in NASA funding Contractor’s work.  The schematic shown actually reminds me of existing food processing equipment – large holding tanks of ingredients from which the raw materials are drawn to be mixed or deposited.  As I mentioned, commercial ovens can span hundreds of feet and house as many burners.  Coming up with a process that could handle baking on the same scale might be appealing.

 But baking is only half the battle.  Once the product is made, it still has to be packaged - which can be a 2D printed nightmare... but that's another story altogether.